|
SQL Tools for MiniMRP |
|
 Introduction Navigation Inventory Assemblies Customer Orders Purchase Orders Works Orders Contacts Reports Tools |
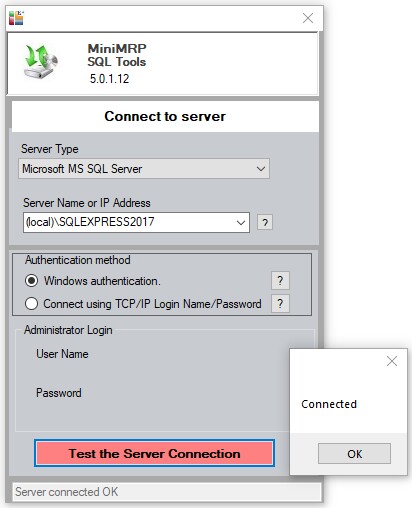
Making a Backup or Migration File.If you're upgrading to a new version of MiniMRP you'll probably want to take your data with you. This page explains how to make a backup file that can be 'Restored' later into a newer version of MiniMRP. The way a backup is made depends on the type of database you're upgrading FROM. MiniMRP has two types of Database. #1. The 'default' database (also referred to as 'JET') installed/used by default with all versions of MiniMRP. #2. SQL Server databases. This is an optional feature which is not available with v3 or v4/v5 'Standard' Editions of MiniMRP. It's only available with Enterprise or 'Pro' versions and, even then, it's not enabled by default so you or your system administrator will certainly know if you're using SQL Server. if you've been using that first option - the default (JET) database - then it's simply a case of going to the 'Tools' menu within your current version of MiniMRP and selecting the 'Database Utilities' option and 'Backup'. This creates a backup file on your computer in a chosen location. Make a note of the name and location of the backup file or maybe make a copy of that file on a USB Thumb Drive or other storage media. You can ignore the rest of this page. The rest of this page explains the backup process for users who are using SQL Server. Backing up your old/current data from SQL Server.This step assumes that you have the necessary Login/Account with permission to connect to your SQL Server. The first thing to do is to install MiniMRP version 5 Professional Edition. Only v5 Pro has the tools required to connect to SQL Server and create a database migration file. For example even when upgrading from v4 you'll still need to use the v5 tools to connect to the v4 database and create the backup/migration file. MiniMRP v5 usually installs in the folder On some older computers the folder name might not include the '(x86)' text. Start the DBTools program. Be sure DBTools is version 5 or above. Select the Server Type: Microsoft SQL Server or MariaDB/MySQL. In our example we're connecting to a local instance of Microsoft SQL Server using Windows Authentication. If this isn't the case then you may need to select the TCP/IP option and enter user name and password.
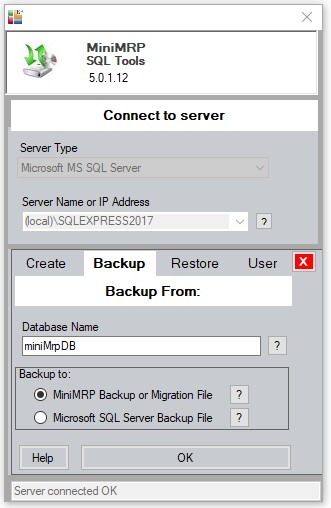
Click the button to "Test the Server Connection". If all was setup correctly you should get a "Connected" notification and the display changes to show "Create, Backup, Restore and User" tabs across the middle of the window as shown in the picture below. Select the 'Backup' tab.
Note that in MiniMRP version 4 the Database Name was always "miniMrpDB" and it could not be changed. So, if migrating from v4, be sure to enter miniMrpDB as the database name. Select the option to Backup to a "MiniMRP Backup or Migration File". Click the OK button. A window will appear asking for the name and location for the backup file. Follow the OnScreen prompts to complete the backup process. Make a note of the name and location of the backup file or maybe make a copy of that file on a USB Thumb Drive or other storage media. Close DBTools - Even if you're going to restore immediately to your new server/database it's still best if you close the current session of DBTools and start a new one.
|
|
|