
Introduction
Installation
.. .. Technical Info
.. .. Network/multi-User
.. .. MS SQL Server
Upgrading
.. .. From v3 to v4
.. .. v4 to newer v4
.. ..To SQL Server
Navigation
.. .. Menus and Tabs
Inventory
.. .. New Item
.. .. List/View/Edit
.. .. Item Vendors
Assemblies
.. .. New Assembly
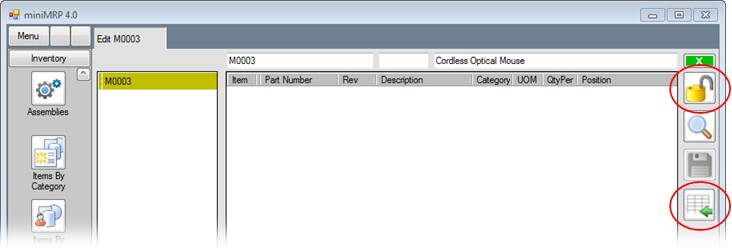
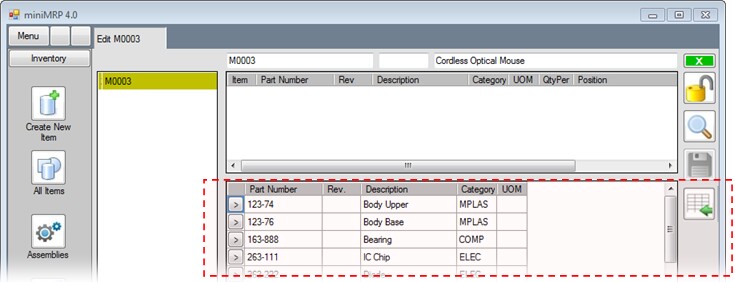
.. .. List/View/Edit
.. .. Assembly Types
Customer Orders
.. .. New Customer Order
.. .. List/View/Edit
.. .. Delivery/Shipping
Purchase Orders
.. .. Item Vendors
.. .. New Purchase Order
.. .. List/View/Edit
.. .. Goods Receiving
.. .. Advanced
Works Orders
.. .. Introduction
.. .. New Works Order
.. .. Editing/Processing
Contacts
.. .. New Contact
.. .. List/View/Edit
Reports
.. .. MRP Shortage Forecast
.. .. Shortage Snapshot
Tools
.. .. Backup/Restore
|