|
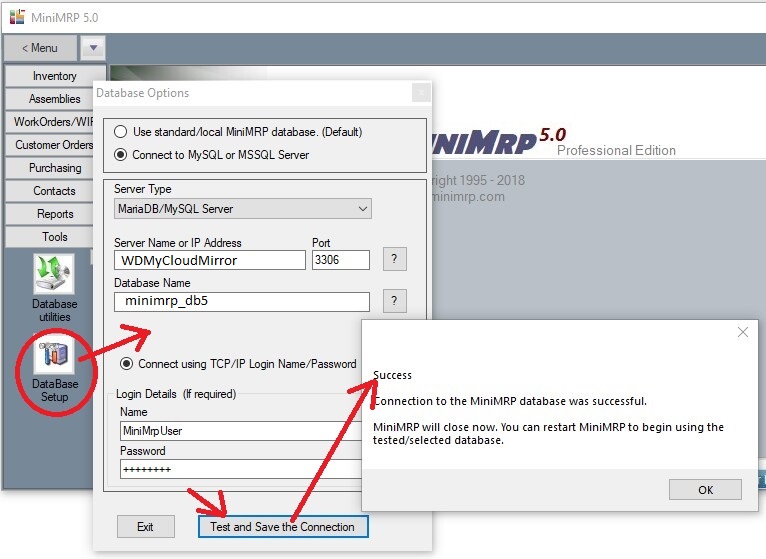
Setting up the MiniMRP program to connect to MariaDB or MySQL.This stage assumes the MiniMRP user has a MySQL user account/login to connect to your MySQL Database/Server. If you do not then you should go back to the Server Setup and set things up at the server before continuing with the MiniMRP setup. When you start MiniMRP for the very first time it will be using its own local 'built in' database. This next stage explains how to 'point' MiniMRP at your NAS device instead. Go to the very bottom of the menu on the left of the MiniMRP program window and select the option "Database Setup". If you don't see that option you'll need make sure you have the 'Professional Edition' of MiniMRP. (standard/personal editions can not connect to MySql servers)
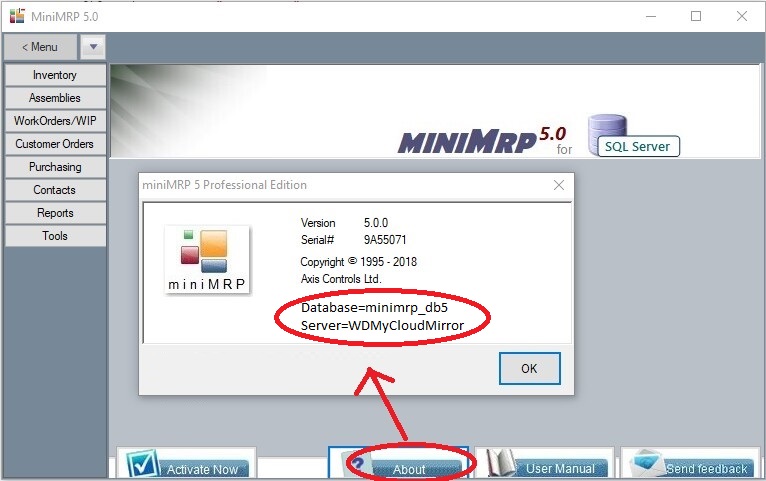
At the very top of the setup window select the option "Connect to MySQL or MSSQL Server" Next is 'Server Type'. MiniMrp can connect to Microsoft SQL Server or MariaDB/MySQL Servers. Change the 'Server Type' to 'MariaDB/MySql Server'. Fill in the remaining options for Server Name, Database Name, User Name and Password. In our example we're connecting to a Western Digital MyCloud device on our local network which is reachable using the device name "WDMyCloudMirror". In your case, depending on your NAS device, you may need to use the device's IP address instead. Click the 'Test and Save' button. If you've set everything up correctly you'll see the 'Success' message. If you see an error message instead then check your settings and try again. If necessary go back to Server Setup Remember: MySQL user names etc. can be case sensitive so make sure your connection details are correct. Once setup correctly MiniMRP will close and you can restart MiniMRP with the new connection settings. Click the "About" button to confirm you've connected to your NAS device.
You can now use MiniMRP. |
|
| MiniMRP User Guide. | |